 |
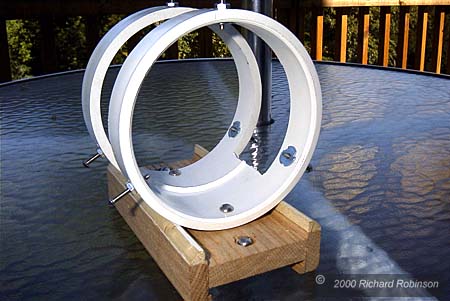
This
is the finder ring made from a 4 inch PVC pipe coupling. The rings
were created by sawing away the center section of the coupling.
The scope hold down screws screw into T-nuts and have locking nuts on the external side of the ring. The slider wooden base and the sides of the slider base are made from Oak hardwood, 1/2 inch thick. The small quarter round pieces keep the PVC rings from rolling from side to side. All wooden parts were glued and nailed together with a small air nailer. The PVC rings are held to the wooden base by short screws and T-Nuts. The remaining screws shown to the front and rear on the rings lock the slider base to the rail. |
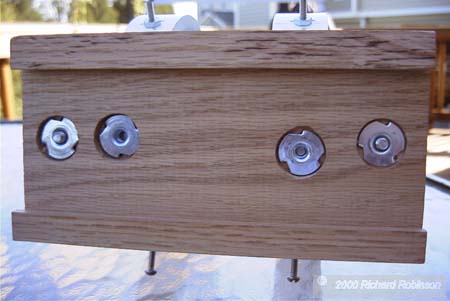 |
This
photo shows the bottom of the wooden slider base. Note that the T-nuts
are recessed and do not touch the rail.
The base is locked in place by screwing the two outermost screws further into the T-nut. This lifts the assembly and locks it into place because the side rails have a small lip which interfaces with a corresponding lip in the rail. This is not as effective as a dovetail V like the Losmandy rail uses, but is something I could manufacture. I'm not sure I know how to cut a dovetail. |
 |
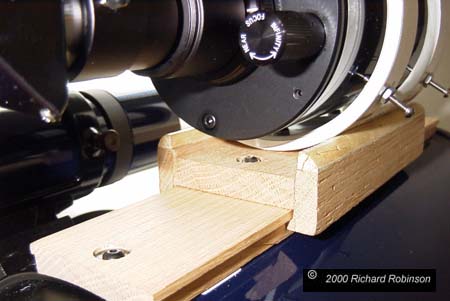
This shows the front view of the slider. In this view you can see the small lip I put in the side rails. |
 |
The T-nuts for the finder mounting screws were held in place with epoxy. I found that the nuts tended to shift and thus made it difficult to align the MAK 500. Adding the epoxy reduced the unwanted shifting considerably. |
 |
This
photo shows the slider and rail mounted to the LX 200.
The rail is held in place with the screws that came with the piggy back mount. These are slightly longer than the screws than come with the scope. The bottom of the rail is curved to match the curvature of the LX 200. Actually, it's slightly off. I made the curve cut by setting my 10 radial arm saw for ripping and then pulled the blade cross cut fashion down the length of the rail. This in not an easy cut to make and can be DANGEROUS. So please don't try it unless you are accomplished at using a radial arm saw. Start with a piece of wood longer than the rail needs to be. Clamp it securely in place and then make the cross cuts carefully. Do not remove more than 1/32" with each cut. Use 7-8 multiple cuts to remove enough material. |
 |
This is the complete assembly mounted to the LX 200. |
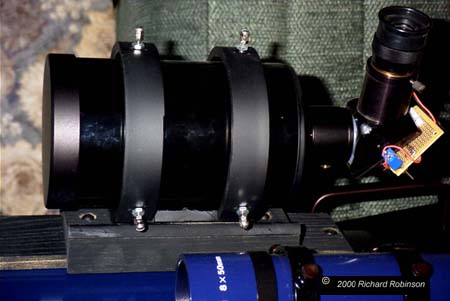 |
Now
it is really complete. This photo is from the other side of the scope
and the rings and rails have been painted flat black.
Note that I've also added additional nuts to the finder screws. These nuts are tightened against the screw heads and then secured with super glue. The head plus the nuts make a small knob which makes it much easier for cold finders to grip. You can also see in this photo the modification I made to the finder star diagonal to add a LED that illuminate the finder cross hairs. |
|
|
|