 |
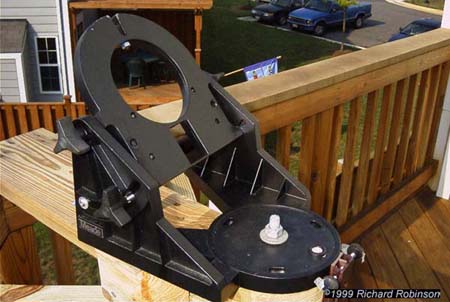
This
photo shows the wedge mounted on the pier I attached to my deck.
The deck is a second story deck, so the pier is just mounted to the railing
and floor of the deck. There are 2 x 4 braces and steel cable
guy wires to help steady the pier and reduce vibrations.
I will probably replace the cables with 2x4 this summer as there are still some low frequency vibrations when the 40 pound scope is mounted to the wedge. |
 |
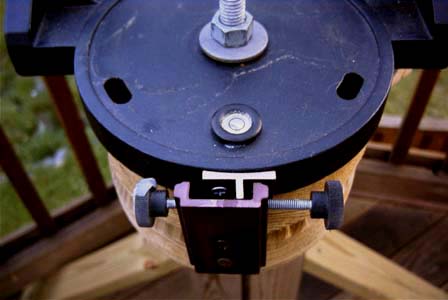
This
is a close up of the wedge mount. There is a 2 x 8 coming from
the deck rail and another 2 x 8 leveling platform attached to that.
The center bolt of the wedge hold the wedge to the leveling platform and the leveling platform against 4 leveling bolts. The azimuth adjustment is attached to the leveling platform. |
 |
This
photo more clearly shows the leveling platform, the leveling bolts and
the azimuth adjustment.
To make azimuth adjustments you need to loosen the center bolt slightly and then use the adjustment screws to change the azimuth of the wedge. It's important to get the rail arm and wedge aligned close to the north south direction initially because the azimuth adjustment vas a very limited range. |
 |
Here
is a close up of the azimuth adjustment. I simply used long wood
screws and attached the standard Mead adjustment mechanism to the rail
arm.
To adjust the wedge in azimuth, you loosen the large bolt slightly. Then loosen one of the adjustment screws and tighten the other. The only real problem with this arrangement is that the rotation is not smooth because of the metal to wood interface. It is possible to turn the adjustment screws with no apparent movement of the wedge. Then friction gives way and the wedge moves. I may add a sheet of Teflon in the future. Note, that I almost ran out of azimuth adjustment. |
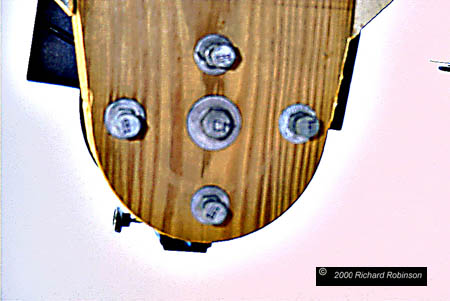 |
This
photo shows the bottom of the rail arm. The center bolt goes through
the center of the wedge and the four bolts are leveling bolts.
The leveling bolts have two nuts and washers on each bolt. To level the platform you work these two nuts together to adjust the height of the bolt and then lock it in position once the wedge is leveled. The circular ends were cut on the 2 x 8's using a router. |
 |
This
photo is the space between the bottom of the leveling platform and the
top of the rail arm. You can see the shaft of the central bolt passing
through the space and one of the leveling bolts clearly.
Note that the leveling bolt has two nuts and washers, one each on top and bottom of the rail arm. You can also see that the leveling bolt extends into a hole larger than the bolt itself. Inside this hole is the head of a short bolt recessed into the leveling platform and held in place with a T-nut. Thus the leveling bolt comes in contact with the head of the recessed bolt and not the wood of the rail arm. This design gives a good firm steel to steel contact for the leveling bolt. |
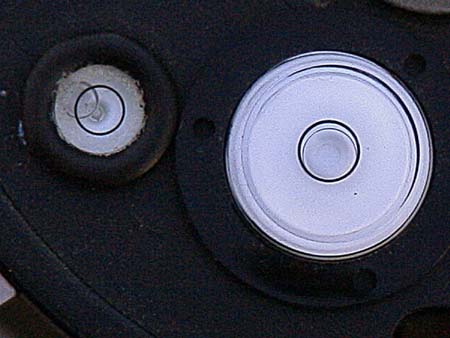 |
Here
is a photo of two bubble levels. The small one on the left is the
built in level of the wedge. The larger level on the right is one
I purchased at a hardware store.
I've chosen to level using the purchased level. The bubble appears slightly off in this photo because the camera was not directly over le level. The bubble actually is properly centered. Note that the level built into the wedge shows a significantly different reading than the larger separately purchased level. As a result I highly recommend that you do not rely on this built in level to position your base. |
|
|
|