| Here
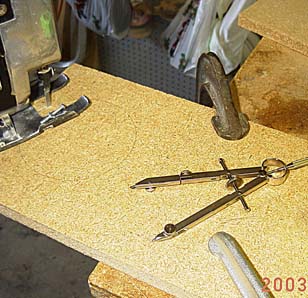
goes cutting the first circle with the scroll saw.
I started with a piece of particle board about 1x8x20 inches. Then used a simple compass to draw the circle and then used the scroll saw to free hand cut the circle. Keep the saw perpendicular to the work piece and always cut on the same side of the line. You'll need to blow saw dust out of the was as you cut. |
 |
| A
close up of the cutting.
Notice that the blade is cutting just on the outside edge of the line. Try to hold this through out the cut. A scroll saw makes this type of a cut easier because you can rotate the blade independent of the saw body. You can probably make the cut with a straight saw, it will just be more difficult to keep the blade on the line. |
|
| This
shows how to stack the circles you cut to get the necessary depth.
Notice that there are two thick pieces and one thin piece of wood in this stack. The thin piece makes the bearing long enough to reach fully across the width of the azimuth box, which needs to be slightly wider than the elevation box to avoid rubbing between the two. |
|
| Once
you get all of the circles cut out, you need to drill a hole through
each
one so you can make a tight cylinder.
It's very important to drill this hole as close to the true center of the circle as you can. So use a center punch and punch through the hole that the compass made when you drew the circle. |
|
| The
holes need to be perpendicular to the side of the circles.
A drill press would be ideal for this. Well, I don't have a drill press, so I used this guide you can purchase from Sears. It 's not as accurate as a drill press, but it's much better than trying to drill the holes freehand. |
|
| Once
you get the holes drilled you just put the circles inside the PVC
Caps.
If they do not fit, you will need to sand them down until they do. An easy way to do this is to put a bolt through the hole and chuck the assembly into a drill. Start the drill and hold the edge of the circle against sand paper. If they are too small, try wrapping them with a layer or two of masking tape. However, if they way too small, just re-cut them. Notice that I made a thin and a thick bearing. The purpose of the thick bearing was to give me plenty of clearance to mount the elevation setting circle and scale pointer. I probably made it thicker than necessary, but it works OK, so I did not re-do it. |
|
| A
high speed Dremel type tool is ideal to cut away the excess
plastic.
You could also use a hand saw with a fine plastic cutting blade and then sand the rough edges down. You want to make sure that the plastic is trimmed away so the wood will seat good with the side of the elevation box. |
 |
| As a final touch I drilled out some the wood from the inside to lighten the assembly. |
|
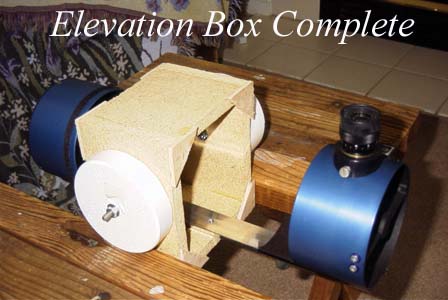
| This
photo shows how the elevation circles mount on the the elevation
box.
The 4-1/4" reflector is mounted in the box and the whole assembly is balanced on the elevation circles. I glued the circles to the side of the box. This made putting inside the suitcase a real challenge. Next time I don't think I'll glue them. |
 |
| This
picture was taken of the finished mount. It shows the elevation
circle
riding on the teflon chair tips inside the cut out in the azimuth box,
which is the next item you need to build.
|
|
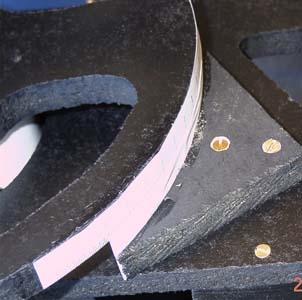
| This
photo shows how I added the elevation scale marker.
After gluing the scale to the elevation circle I mounted a piece of wood with a matching circle cut out to the side of the azimuth box. I then glued a strip of paper to the curved part of the wood. The edge of the paper serves as the marker for the elevation scale. The piece of wood comes free, since it was just one of the corner pieces left over when I cut the elevation circle from the square piece of wood. |
 |
 |
|
|
|
|